Introduction
An inadequate water supply can disrupt a household instantly. On construction sites, one of the most common design errors is miscalculating the required volume of an overhead water tank.
An undersized tank leads to frequent dry spells, forcing water pumps to run continuously, which spikes electricity bills and burns out motor windings. Conversely, an oversized tank adds unnecessary dead load to the structural frame of the building. This requires heavier columns and beams, which increases construction costs.
This comprehensive guide will help you accurately calculate the exact size, capacity, and dimensions of an overhead water tank for any residential building.

Why Accurate Tank Sizing Matters
Water is heavy. One liter of water weighs exactly one kilogram. If you build a 5,000-liter tank, you are placing a 5-metric-ton standing load on top of your house. This weight does not include the dead weight of the concrete, steel, and plaster used to build the tank itself.
Proper calculation ensures:
- Structural safety against structural failure or cracking.
- Consistent water pressure throughout the plumbing system.
- Optimised pumping schedules that extend the lifespan of your water pump.
- Reduced construction material wastage.
Standard Water Consumption Rules
Before calculating tank dimensions, you must determine how much water the house actually requires. Water consumption varies by region, climate, and lifestyle, but standard civil engineering codes provide baseline values.
According to Indian Standards (IS 1172), the basic water requirement for a residential building in a suburban or urban area is 135 liters per head per day (LPHD).
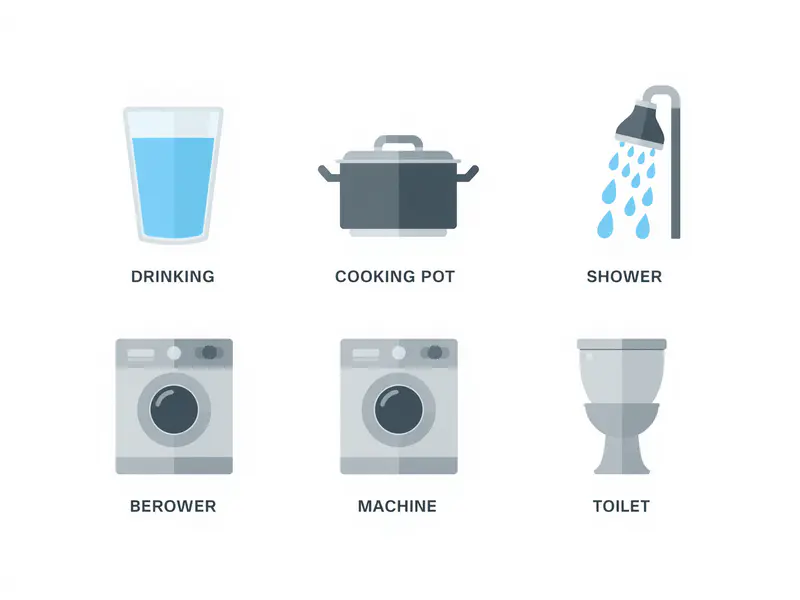
Breakup of Daily Water Usage per Person
- Drinking: 5 liters
- Cooking: 5 liters
- Bathing: 55 liters
- Washing Clothes: 20 liters
- Washing Utensils: 10 liters
- House Cleaning: 10 liters
- Flushing Toilets: 30 liters
- Total standard usage: 135 Liters
In luxury housing or high-income residential areas, this requirement can increase to 200 liters per head per day due to larger washing machines, bathtubs, and lawn maintenance.
A properly designed overhead water tank works efficiently when combined with a rainwater harvesting system. Learn how to calculate rainwater collection capacity and storage requirements for residential buildings.
Core Formulas for Water Tank Calculations
To convert a volume of water into physical tank dimensions, use these plain-text mathematical relationships:
- Daily Water Requirement = Total Number of Residents x Daily Consumption per Person
- Volume of Water (in Liters) = Volume in Cubic Meters x 1000
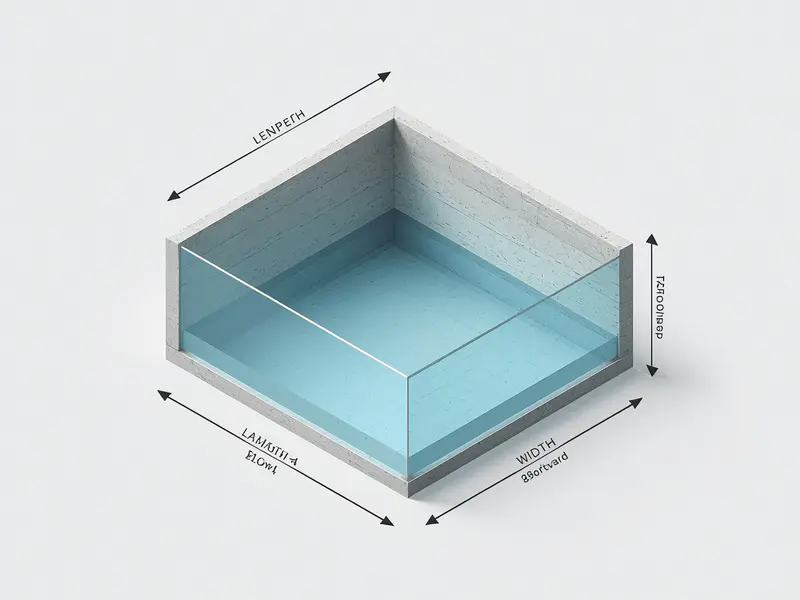
- Volume of Tank (in Cubic Meters) = Length x Width x Depth (for Rectangular Tanks)
- Volume of Tank (in Cubic Meters) = 3.1416 x (Radius x Radius) x Depth (for Circular Tanks)
Essential Unit Conversions for Construction
Site supervisors and contractors often use different units. You must know how to convert these fluid measurements seamlessly.
- 1 Cubic Meter = 1,000 Liters
- 1 Cubic Meter = 35.314 Cubic Feet (CFT)
- 1 Cubic Foot (CFT) = 28.316 Liters
- 1 Gallon (US) = 3.785 Liters
- 1 Gallon (UK) = 4.546 Liters
Measurement Conversion Reference Table
| From Unit | To Unit | Multiplication Factor |
|---|---|---|
| Cubic Meters | Liters | 1,000 |
| Cubic Feet (CFT) | Liters | 28.317 |
| Liters | Gallons (US) | 0.264 |
| Liters | Gallons (UK) | 0.220 |
| Cubic Meters | Cubic Feet (CFT) | 35.315 |
Step-by-Step Calculation Examples
Let us look at two real-world design scenarios using concrete numbers.
Example 1: Rectangular Concrete Tank for a Family of 5
Step 1: Calculate the required daily capacity.
- Total residents = 5 people
- Consumption rate = 135 liters per person per day
- Total required volume = 5 x 135 = 675 Liters per day
To account for power outages, pump maintenance, or unexpected guests, engineers include a safety margin. It is best practice to design for 2 days of water storage capacity.
- Target Storage Capacity = 675 x 2 = 1,350 Liters
Step 2: Convert liters into cubic volume.
- Volume in Cubic Meters = 1,350 / 1,000 = 1.35 Cubic Meters
Step 3: Establish fixed dimensions based on site availability.
Assume the available roof space allows a fixed Width of 1.2 meters and a usable Depth of 1.0 meter.
- Tank Volume = Length x Width x Depth
- 1.35 = Length x 1.2 x 1.0
- 1.35 = Length x 1.2
- Length = 1.35 / 1.2 = 1.125 meters
Step 4: Add freeboard allowance.
Never design a tank to fill completely to the brim. Ball valves and overflow pipes require air space to function. Always add a minimum Freeboard height of 150 mm to 300 mm (0.15 to 0.3 meters) above the maximum water level.
- Total Internal Depth = Water Depth + Freeboard
- Total Internal Depth = 1.0 meter + 0.2 meter = 1.2 meters
Final Structural Dimensions for Example 1:
- Length = 1.125 meters
- Width = 1.2 meters
- Total Height = 1.2 meters
Example 2: Circular Overhead Tank for a Multi-Family House (12 Residents)
Step 1: Calculate total required volume.
- Total residents = 12 people
- Consumption rate = 150 liters per person per day (factoring in minor wastage)
- Total daily volume = 12 x 150 = 1,800 Liters
- 2-Day storage reserve = 1,800 x 2 = 3,600 Liters
Step 2: Convert to cubic meters.
- Tank Volume = 3,600 / 1,000 = 3.6 Cubic Meters
Step 3: Determine dimensions using the circular area formula.
Assume a fixed internal diameter of 1.8 meters is selected for this build.
- Radius = Diameter / 2 = 1.8 / 2 = 0.9 meters
Formula: Tank Volume = 3.1416 x (Radius x Radius) x Water Depth
- 3.6 = 3.1416 x (0.9 x 0.9) x Water Depth
- 3.6 = 3.1416 x 0.81 x Water Depth
- 3.6 = 2.5447 x Water Depth
- Water Depth = 3.6 / 2.5447 = 1.41 meters
Step 4: Add freeboard allowance.
- Add 0.2 meters for air space and mechanical float clearance.
- Total Internal Height = 1.41 + 0.2 = 1.61 meters
Final Structural Dimensions for Example 2:
- Internal Diameter = 1.8 meters
- Total Internal Height = 1.61 meters
Water storage and wastewater disposal are both essential parts of residential infrastructure. Read our septic tank design guide to understand sizing, dimensions, and construction requirements.
Structural Loads and Civil Engineering Precautions
Placing thousands of kilograms of water on top of a residential slab introduces severe structural stress. Follow these critical engineering rules during layout planning:
- Column Alignment: Never place a brick or concrete water tank directly on a bare slab center. Position the tank walls directly over main supporting columns and primary beams to transfer the weight straight down to the foundation.
- Slab Punching Shear: If you must build on a slab, use a raised column framework or inverted beams to spread the load across multiple structural points.
- Scupper and Drain Slopes: Cast the internal floor of a concrete tank with a slight 1:50 slope toward the scour outlet pipe. This makes periodic cleaning and flushing out silt straightforward.
Site Quality Controls and Leak Prevention

Water leakage from an overhead tank can rot ceiling plaster, corrode internal steel rebars, and weaken the structure over time. Use these on-site quality checks during construction:
1. Concrete Mix Design and Additives
For cast-in-place concrete tanks, use a minimum mix ratio of M25 grade concrete (1 part cement, 1 part fine sand, 2 parts coarse aggregate by volume). Mix in an approved liquid waterproofing compound, adding roughly 200 ml per 50 kg bag of cement.
2. Shuttering and Honeycombing Checks
Ensure formwork boards are completely tight and sealed with foam tape. Run mechanical pin vibrators during the pour to prevent honeycombing—pockets of void spaces where water can seep through.
3. The On-Site Hydrostatic Leak Test
Before applying internal plaster or external paint, perform this mandatory structural check:
- Seal all plumbing inlet, outlet, and scour sleeves with threaded plugs.
- Fill the concrete tank slowly with water at a rate of roughly 300 mm height per hour.
- Leave the full tank undisturbed for 72 hours.
- Check all external walls, joints, and corners hourly for signs of dampness, sweating, or direct water weeping.
- If the water level drops noticeably without evaporation, locate the source, drain the tank, patch the area with polymer-modified mortar, and re-test.
Frequently Asked Questions (FAQs)
1. What is the standard height for an overhead water tank?
To ensure adequate water pressure at your fixtures, the base of the overhead tank must sit at least 2.1 to 3 meters (7 to 10 feet) above the highest showerhead or tap level. Low water pressure makes water heaters and flush valves malfunction.
2. Can I use a PVC plastic tank instead of building a concrete one?
Yes. Prefabricated plastic or PVC tanks are lightweight, inexpensive, and fast to install. However, concrete tanks insulate water better against extreme summer temperatures and generally last longer if waterproofed correctly.
3. What size water tank do I need for a 4-member family?
A family of 4 requires a minimum daily storage of 540 liters. Installing a standard 1,000-liter tank provides an ideal 2-day reserve that handles minor disruptions comfortably.
4. How often should a residential overhead water tank be cleaned?
Clean the tank thoroughly at least once every 6 months. Sludge, dirt, and algae collect on the floor over time, creating a breeding ground for harmful bacteria.
5. What size should the overflow and wash-out pipes be?
The overflow pipe should match or exceed the diameter of the main inlet pipe—typically 25 mm to 32 mm. Wash-out lines should be at least 50 mm wide to flush out heavy sludge quickly during cleanings.
CPHEEO provides technical guidelines related to water supply systems, storage tanks, and plumbing infrastructure for residential and public buildings.
Summary and Key Takeaways
Accurately calculating your overhead water tank capacity protects your budget and your home’s structural integrity.
- Calculate demand first: Use the baseline of 135 to 150 liters per person per day.
- Include a safety reserve: Design for a 2-day capacity to handle power outages or maintenance.
- Convert correctly: Use 1 cubic meter to equal 1,000 liters of water volume when sizing your tank.
- Include a freeboard: Add 200 mm of open headspace above the water level for valves and airflow.
- Prioritize structural support: Place the tank directly over columns or primary beams to ensure safe weight distribution.
Shakeel T is a qualified Civil Engineer and Structural Consultant with extensive on-site experience in residential and commercial building construction. Specializing in material estimation, cost budgeting, and structural safety guidelines, he has successfully managed multiple real estate projects from foundation to finishing. Through this blog, Shakeel shares field-tested civil engineering thumb rules, IS Code practices, and practical site tips to help home builders execute their projects efficiently and within budget.
Education: Diploma in Civil Engineering
Expertise: Quantity Surveying, Material Estimation, Structural Design, and Site Management.